

How To Set The Time On An Avaya Phone
How to Gear up an Android Phone
Android is the well-nigh pop operating system for smartphones worldwide, and that'southward unlikely to change anytime soon. Then, if you buy a new phone, statistically speaking, it's likely to be an Android model. And, in general, that'south a skilful affair: Android is one of the most versatile and intuitive mobile OS options on the market.
At the same fourth dimension, Android's open up-ended nature ways that setting upwardly your telephone isn't always the foolproof affair it can be with the iPhone. In the time between taking your Android phone out of the box and making your first telephone call, you'll have to make a series of decisions: which Wi-Fi network to use, how to safeguard your phone, whether to import your old phone's settings then along.
The setup process on Android is pretty straightforward, but if you're wondering how to narrow down the options at your disposal, follow our step-by-step guide. And remember: You tin ever reset and try once more.
Before you begin
Bear in mind that every Android phone is slightly different from all the others, and manufacturers oftentimes add together their ain steps to the setup. For simplicity'due south sake, the steps listed here cover stock Android (which is what you'll get with a Google Pixel two), with a few added sections on Samsung-specific steps for Galaxy smartphones. Don't be alarmed if your screens look a niggling unlike from those shown here; only follow the prompts, and your telephone will walk you through the rest.
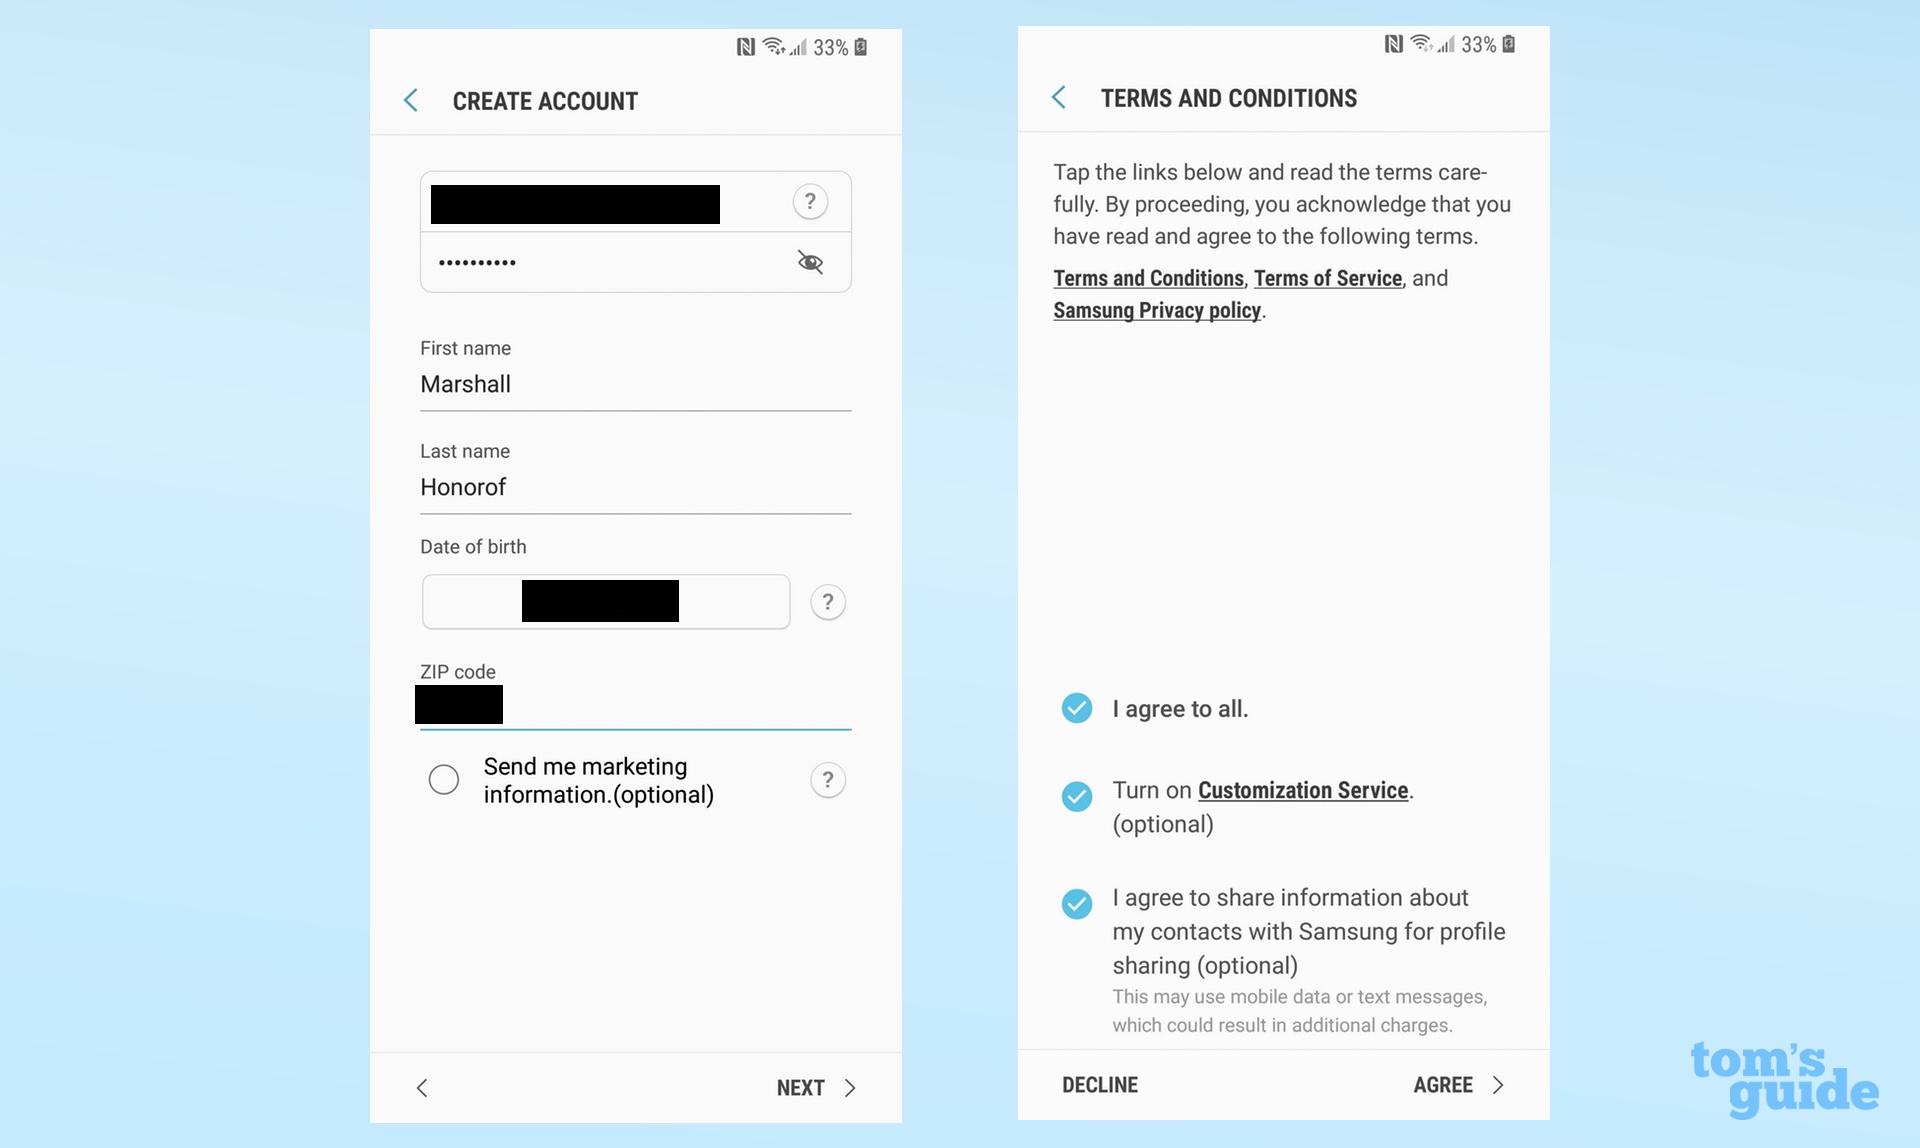
When setting up your phone, yous'll sometimes see screens that ask you to agree to Terms and Weather condition, or yous can simply click Next to advance. If you lot see one of these screens, just follow the instructions and click through information technology; in that location's no real decision-making required on your office.
More: Galaxy S9 vs Pixel 2: What'southward the Best Android Phone?
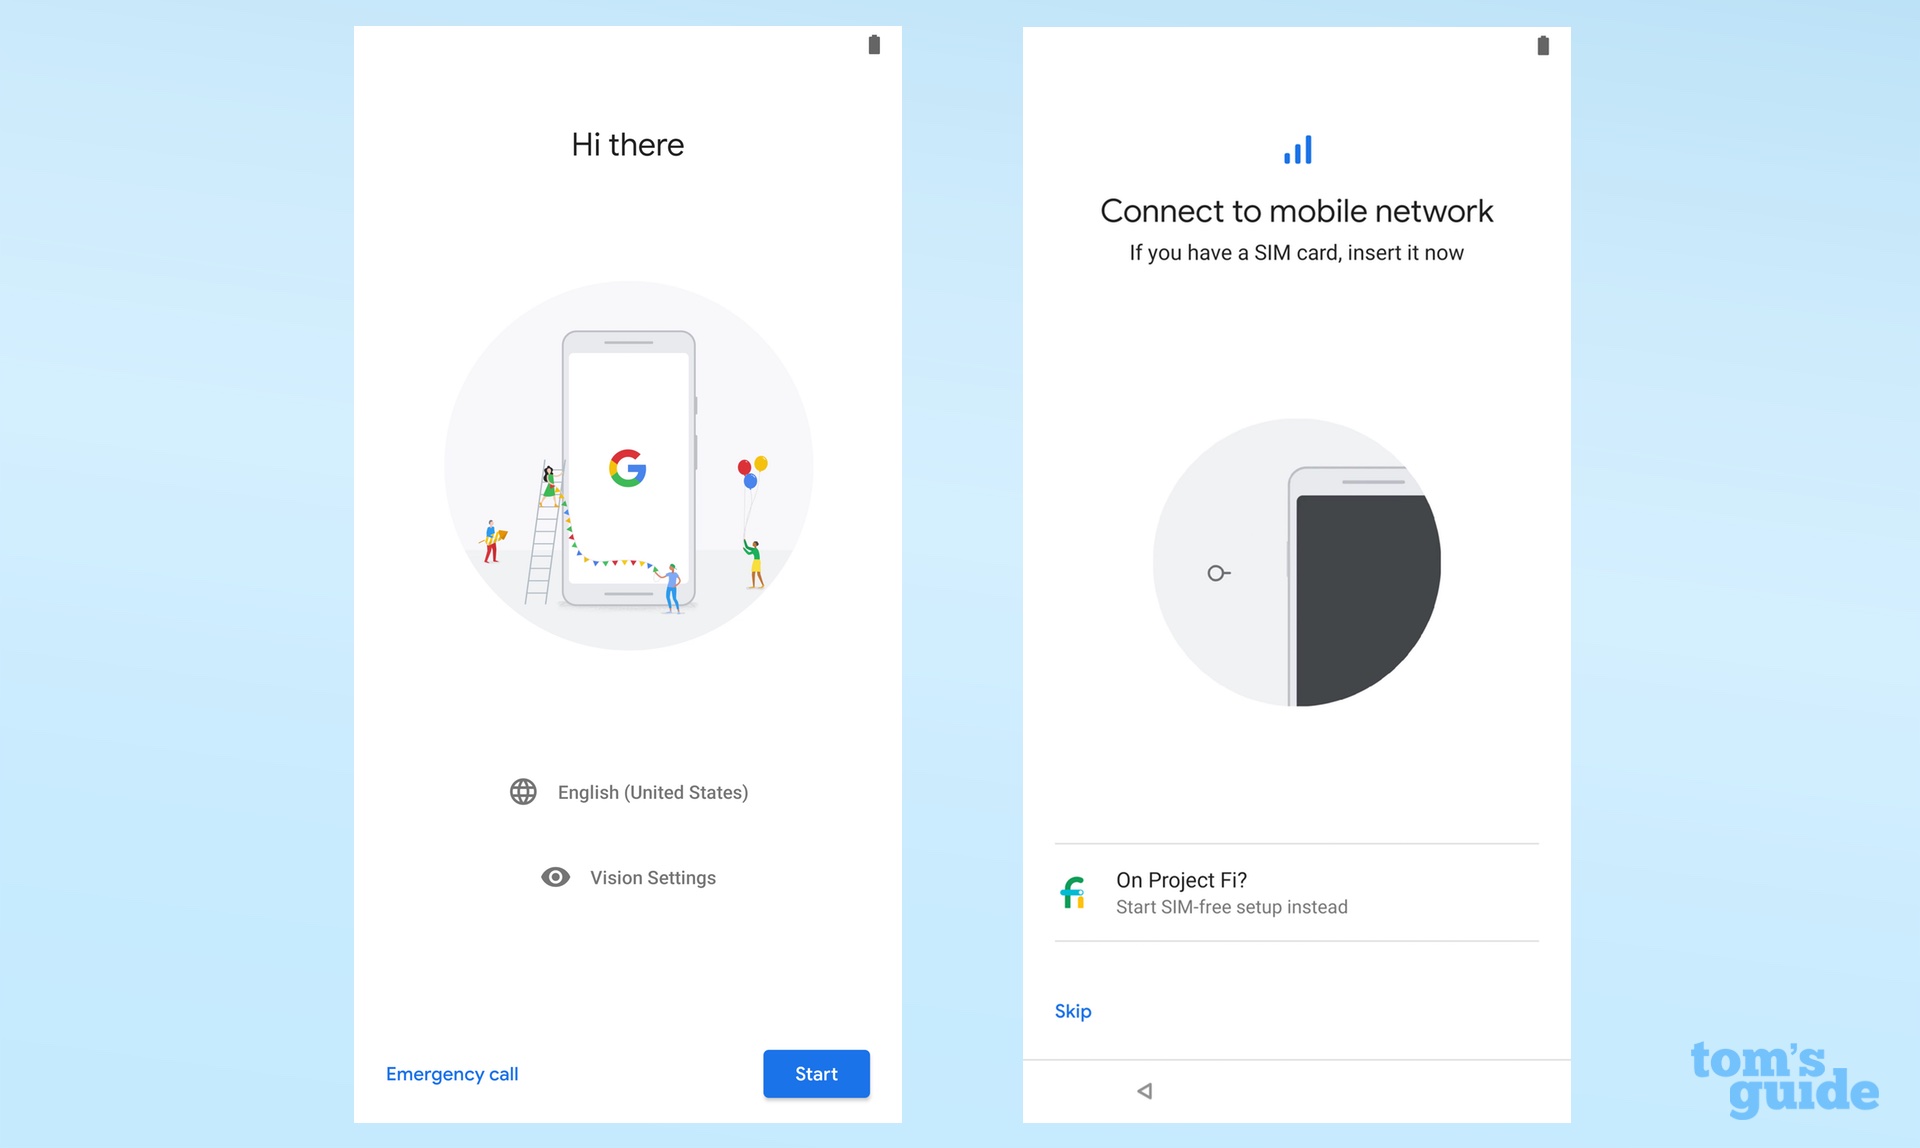
If possible, you should go along your onetime phone around until you're done with the setup. This way, you can automatically transfer all of your accounts and apps. Any you do, brand sure you accept your SIM card out of your old phone if yous programme to keep the same wireless carrier and phone number.
1. Insert your SIM card.
Whether you're starting over with a new phone number or transferring over your old one, yous'll accept to insert a SIM card into the telephone. (If you're buying a make-new phone direct from a wireless carrier, the device may come up with a SIM preinstalled; in this case, inquire a shop representative whether it's easier to use the old or new card.) Consult your new phone'south education manual to find out how to popular out the SIM slot, and then insert your menu in the right configuration. But don't worry; if it's not in the proper position, you'll know right abroad, every bit it volition autumn out.
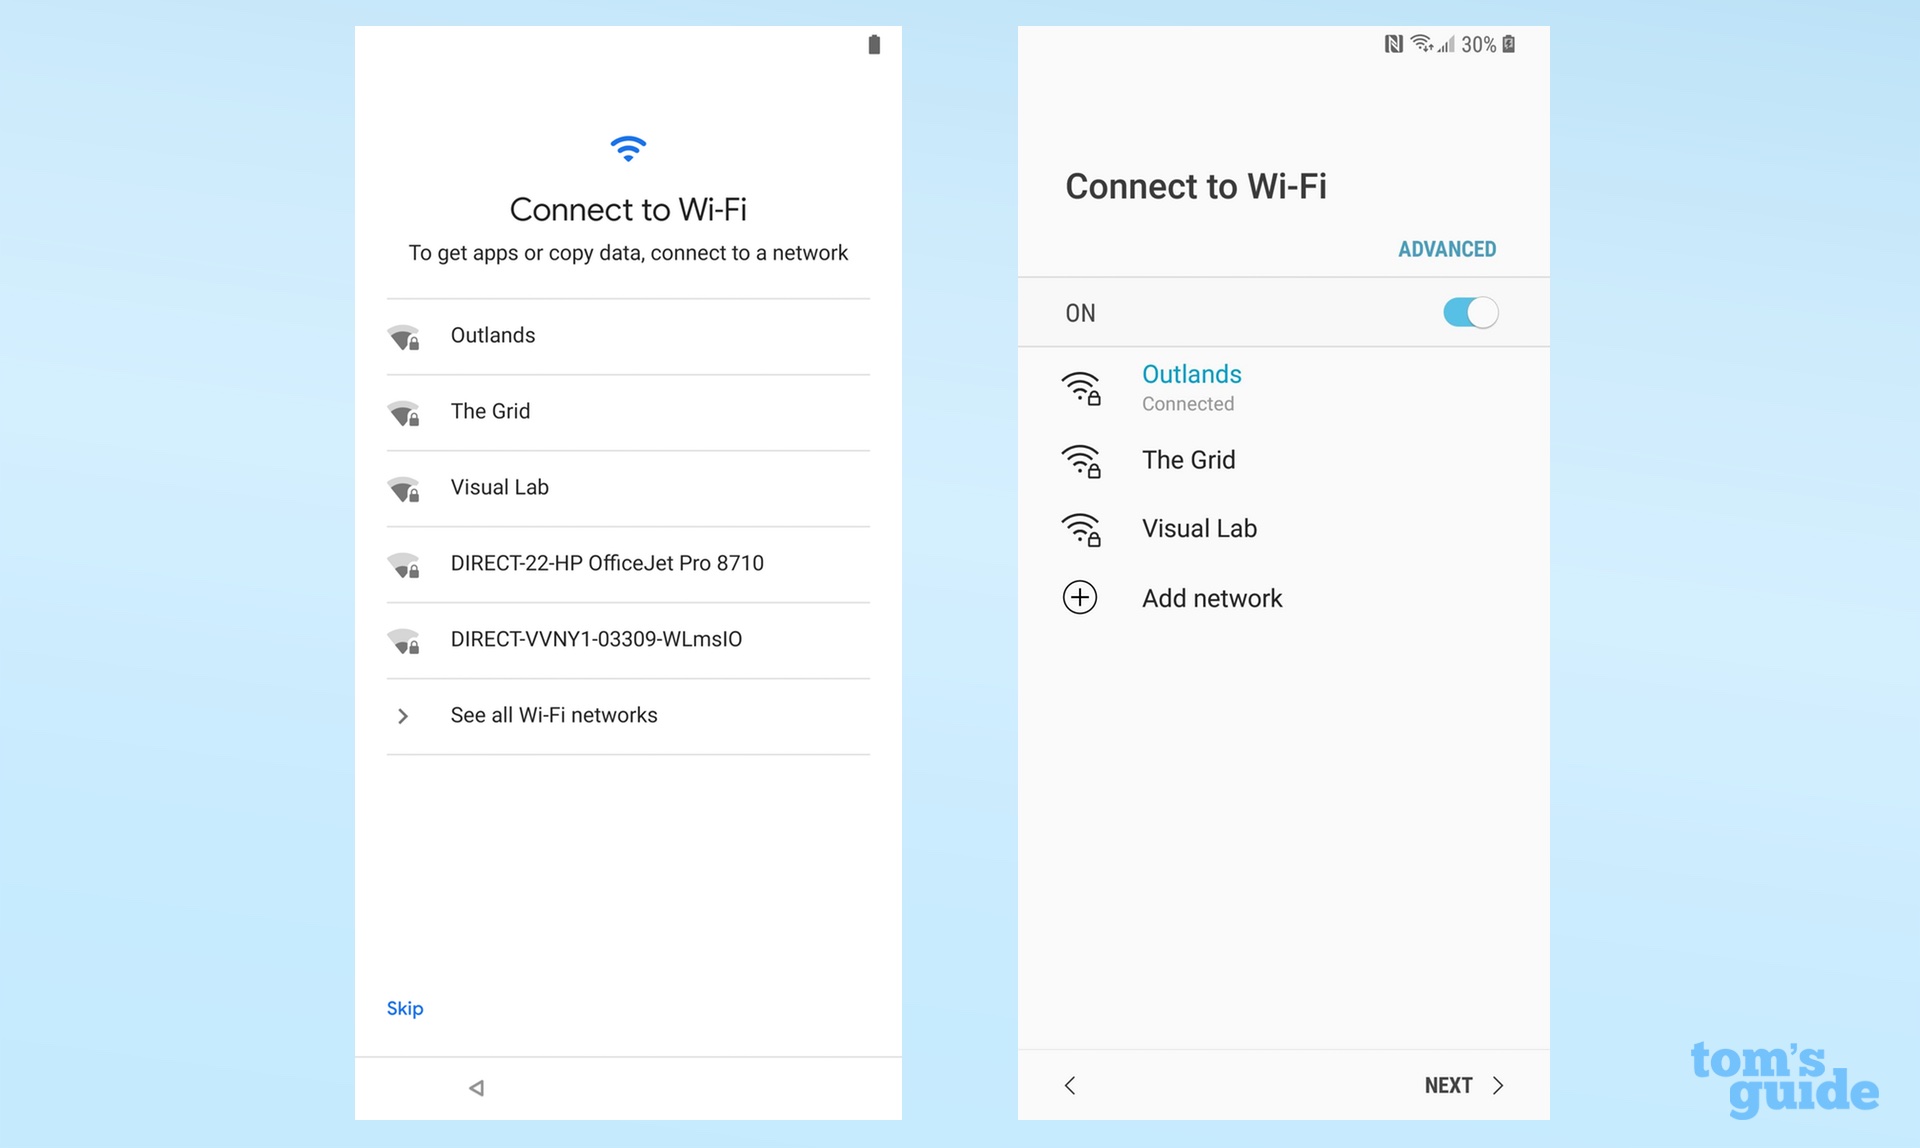
2. Connect to a Wi-Fi network.
This footstep isn't strictly necessary, but considering that getting the phone up and running will take at least a few hundred megabytes of data, you're better off not wasting your precious mobile data. Employ a Wi-Fi connection instead. Choose your network, input your countersign — you know the drill.
3. Import your fill-in information — or don't.
In that location'due south something to be said for getting a fresh starting time with your new phone, but there's no denying that information technology's a lot easier to start life with your accounts already gear up, your text letters recorded and your photos in identify. I feel that it's a lot cleaner and simpler to start from scratch, in which case y'all should select "Fix as new." But if you lot prefer to transfer information, you have some options.

Select a backup: The Pixel 2 lets you transfer data via a specialized cable; everyone else volition have to transfer data wirelessly. Some phones let you transfer data from an Android phone merely; others likewise offer options for cloud backups and transfers from iPhones. Whichever option you choose, select the appropriate prompt and follow the on-screen instructions.
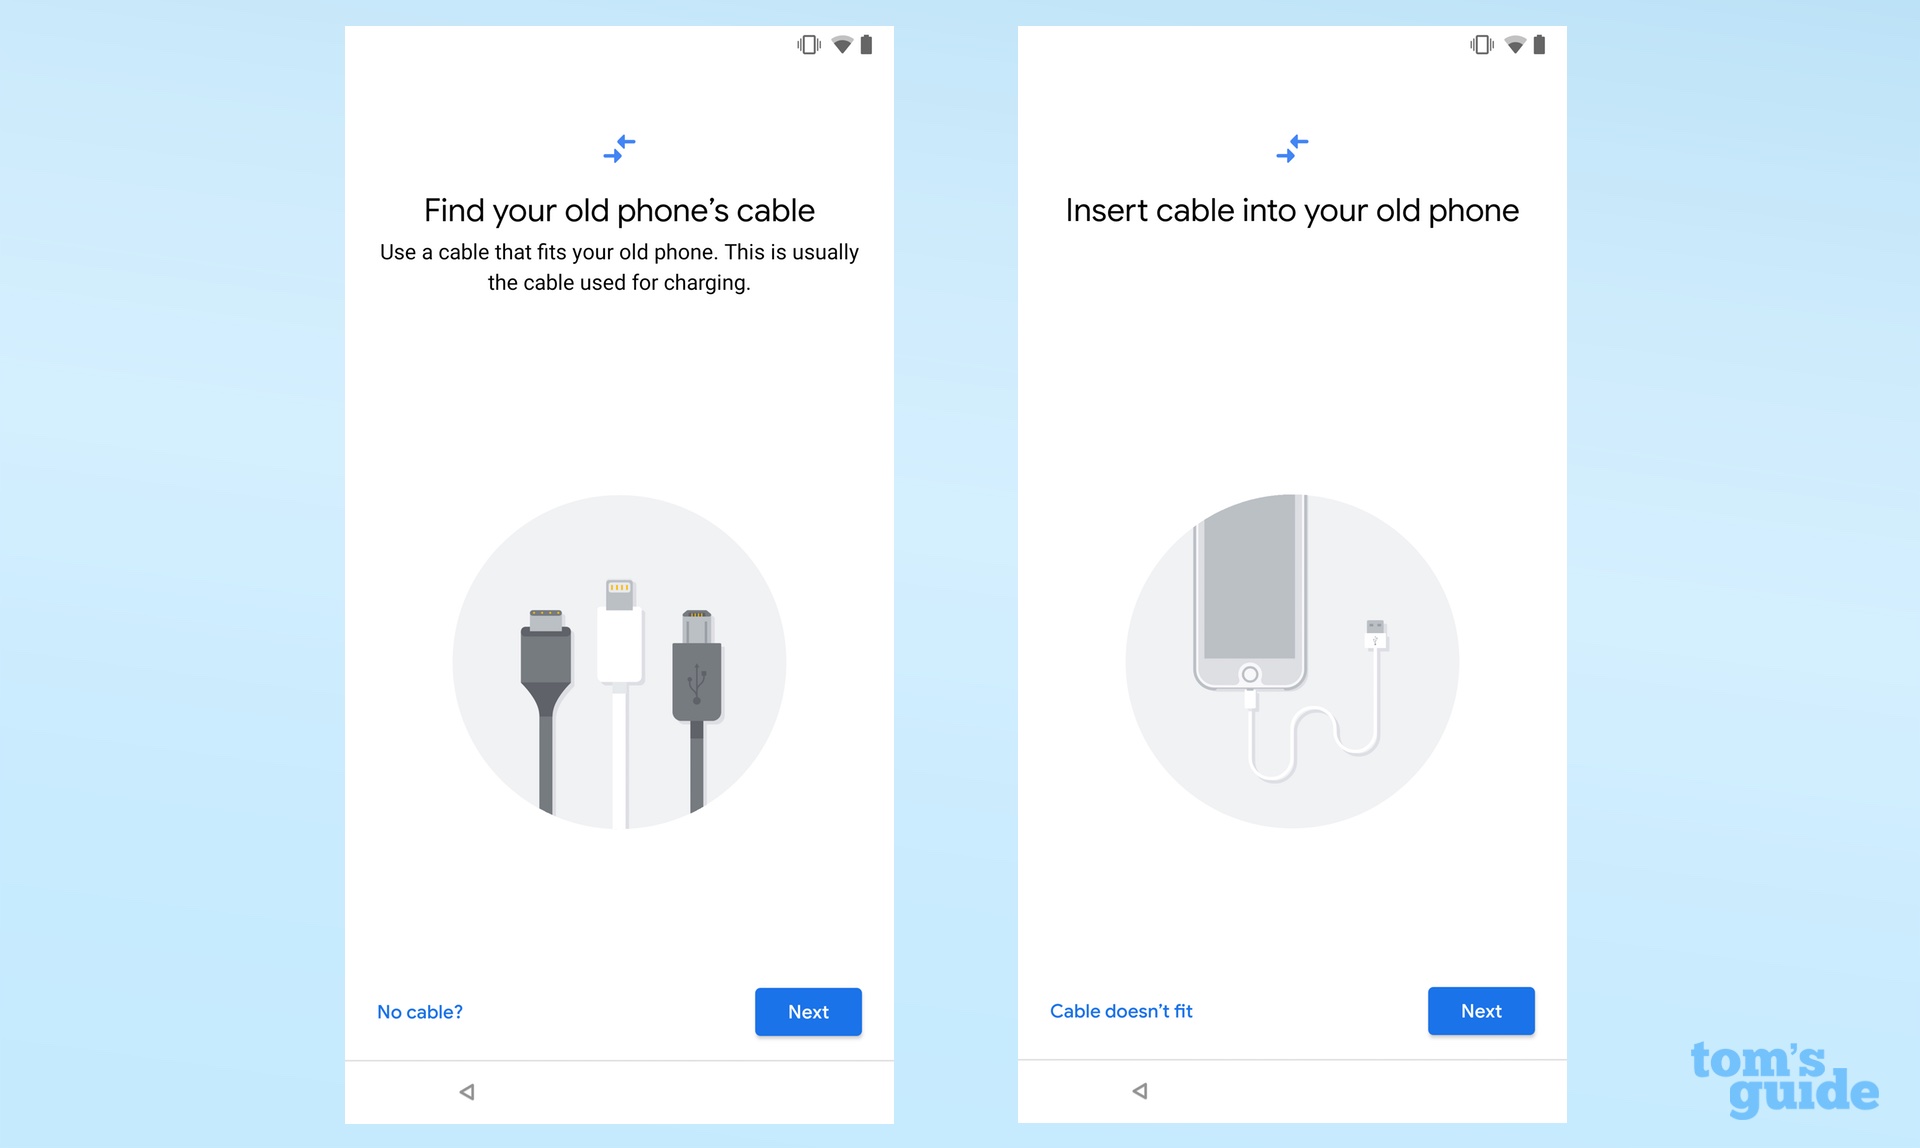
The near mutual scenario is transferring data wirelessly from another Android phone. This process involves using the Google app on your old phone to parse a "Set my device" command. (Yous can say this to your phone or blazon it in; the app volition know where to go from at that place.) Although the process may sound complicated, all you lot really need to practice is follow prompts on two screens to friction match codes and shapes. If your new phone doesn't detect your one-time i at first, simply try it again; it may take a few attempts.

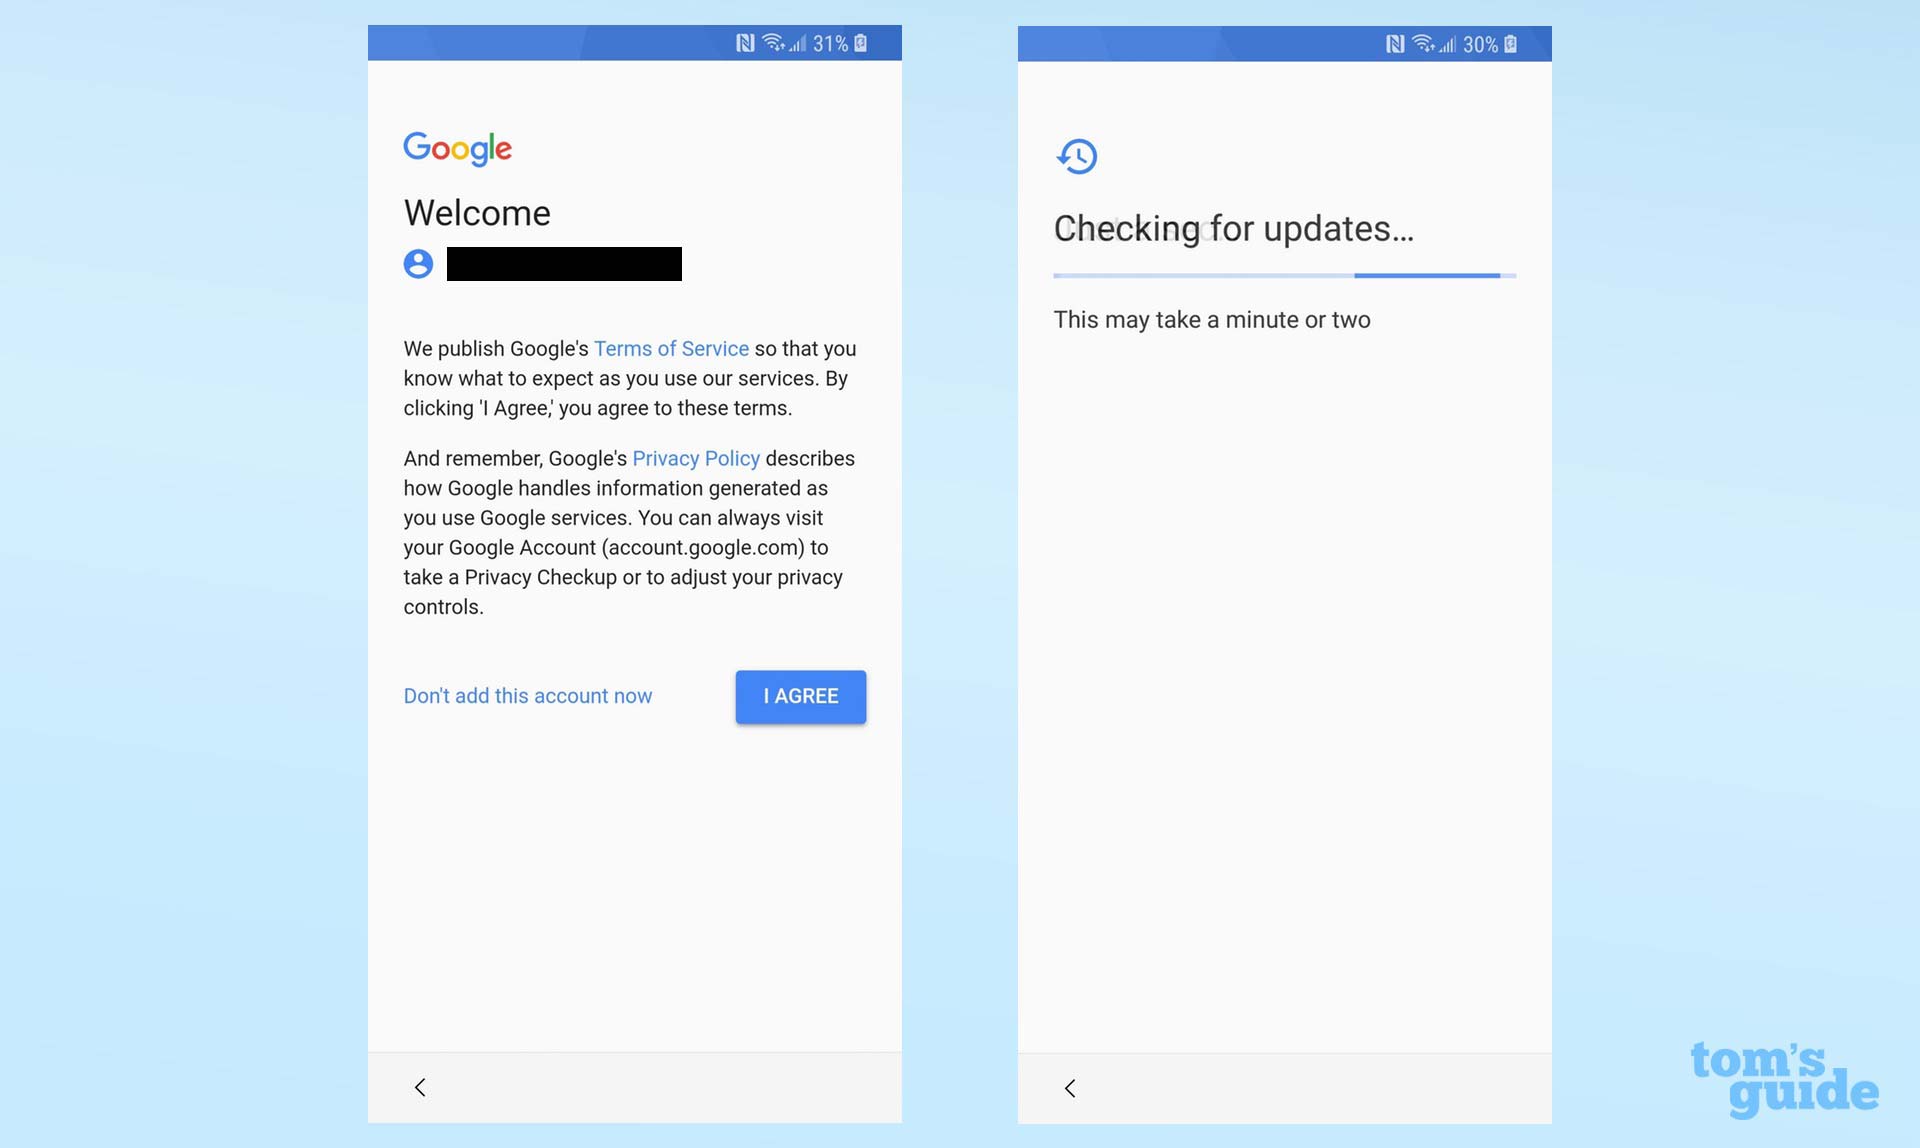
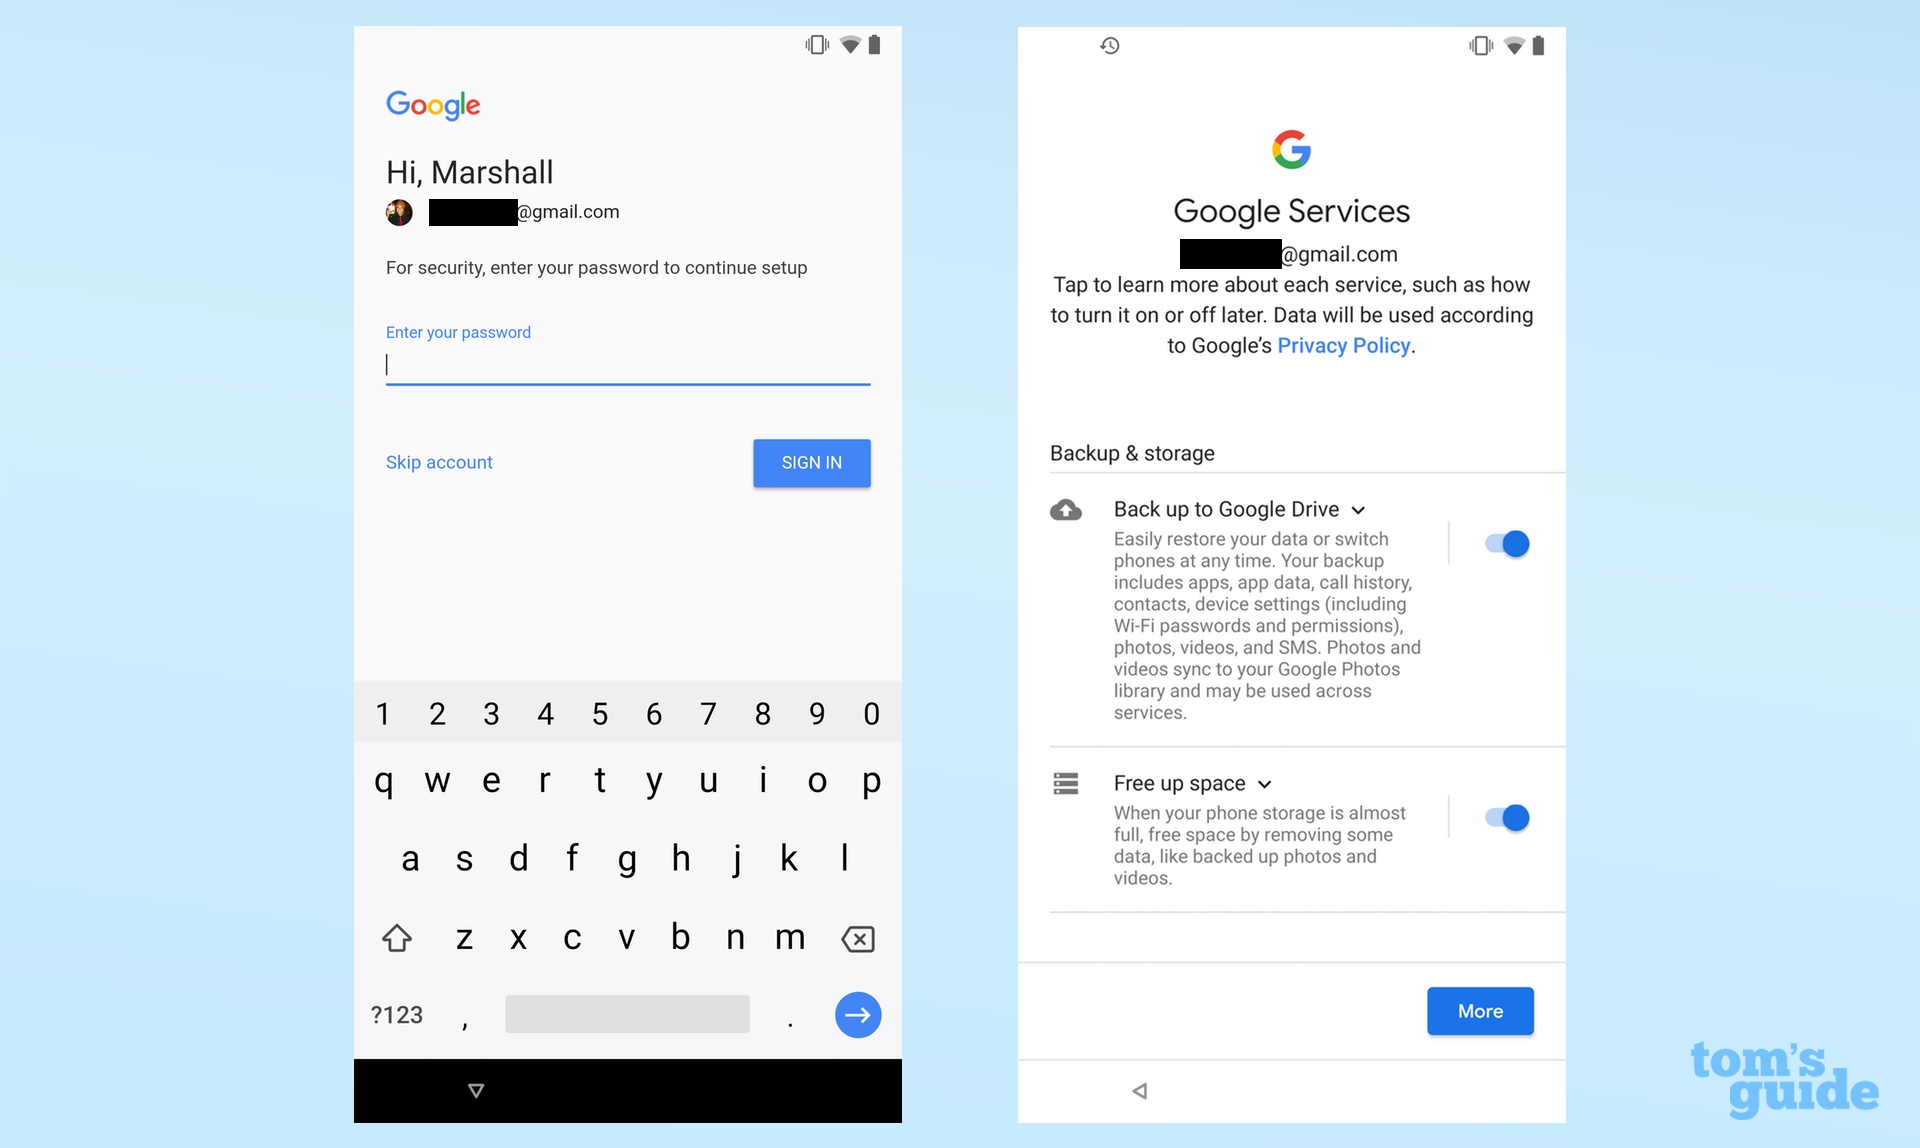
4. Sign in to your Google account.
If y'all loaded a backup into your new telephone, the device will already have your Google account information. However, you lot'll still have to enter your password. Otherwise, enter your Gmail address commencement. Remember: If you use 2-factor authentication, you lot'll still accept to ostend your login on your quondam device. If you've already ditched your previous telephone, asking a fill-in code via text — assuming yous kept your one-time SIM menu, of course. (If both options fail, you can verify your identity in other ways on Google'due south 2FA site, but some of the options get pretty involved.)
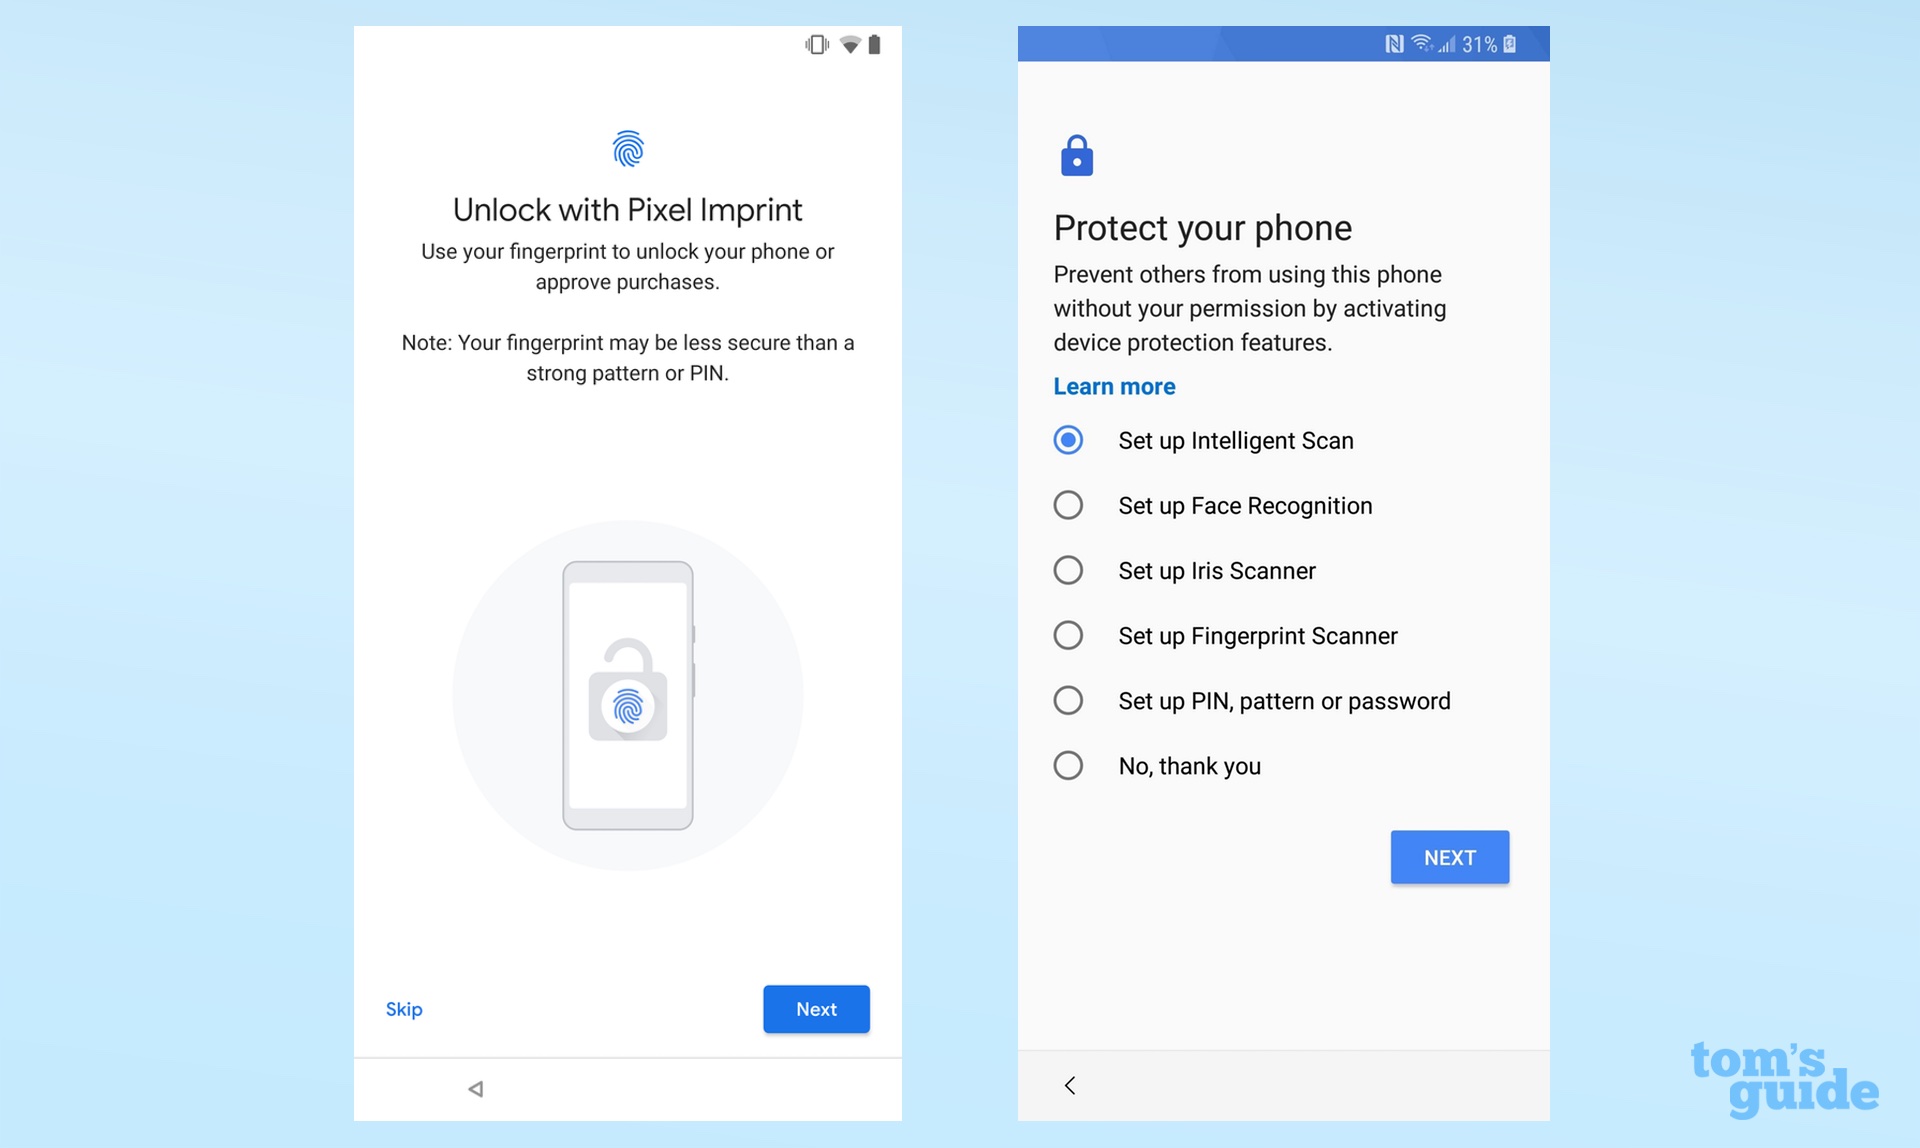
5. Gear up security options.
Like many other aspects of setup, the way you protect your phone will vary considerably depending on what kind of handset you take. The Pixel wants y'all to use a fingerprint scanner; the Galaxy S9 recommends facial-recognition applied science. You lot tin can go with the default option or ready a more traditional option, like a Pivot or password. Whatever you lot exercise, I recommend that yous ready upwards some kind of security measure. Yous tin can always program your phone to featherbed these protocols on trusted networks, merely if your phone falls into the incorrect hands, a simple screen swipe is not going to cease anyone from mining your data.
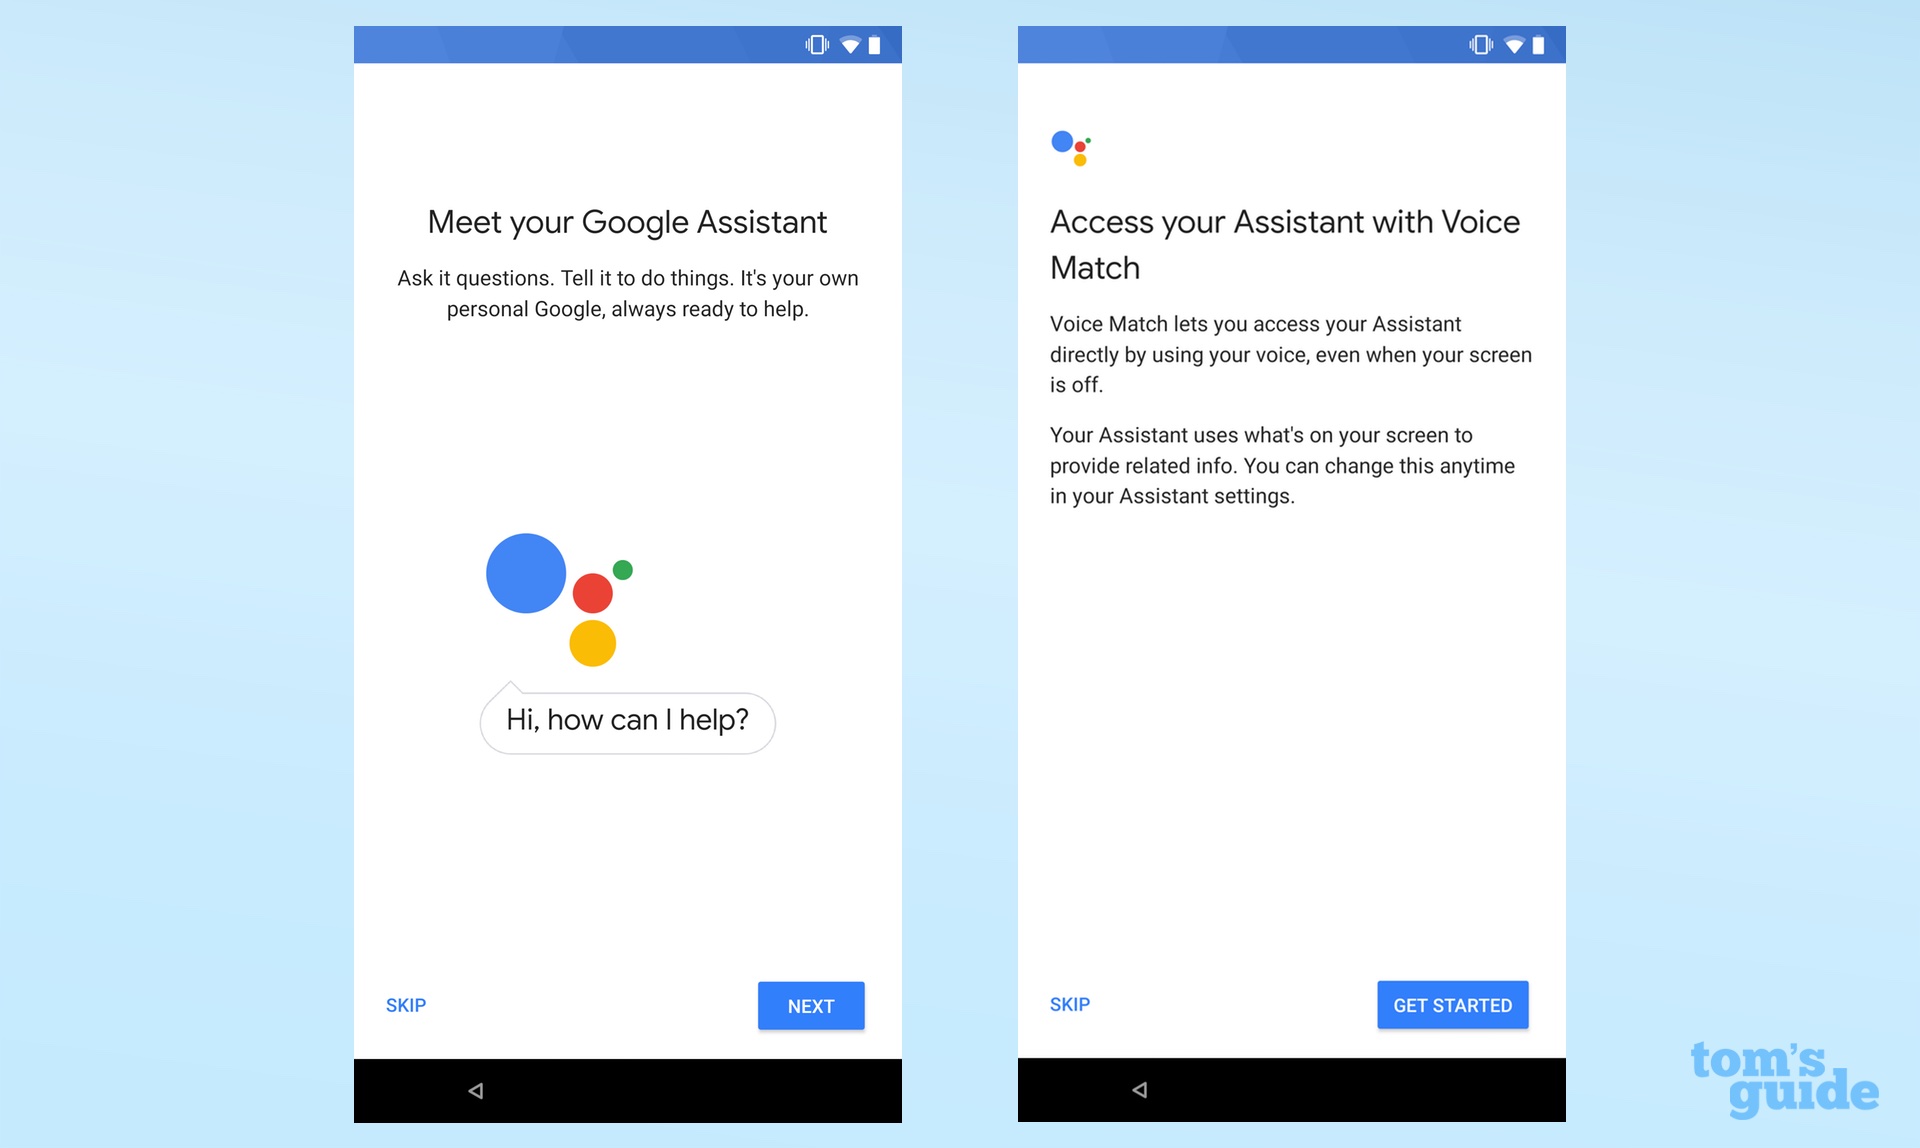
6. Activate additional services.
At this indicate, your phone will probably ask whether you want to set up the vocalization-activated Google Assistant. You do not take to practice this now (or ever), but it takes just a few seconds, so you might as well. Depending on your handset model, y'all may also be able to cull some initial apps to install, or your preferences for notifications. Don't sweat this step too much, because yous can e'er go back and practice it subsequently.
7. (Optional) Become through your manufacturer's setup process.
If y'all accept a stock Android phone (or a phone that emulates stock Android), your setup process ends hither. Only if you have a phone from Samsung, Motorola, HTC or another manufacturer that likes to put its own spin on the OS, you'll probably have a few more steps.
For example, on Samsung phones, you have to set up a Samsung account, which will let y'all to customize your battery options, create secure folders, change font size, get weather forecasts and more than. Motorola phones will walk you through setting up gesture controls.
There's no one-size-fits-all directive to give hither, salve to fill out whatever information your phone requests and tweak the options until you find a solution that works for you. And that'due south the beauty of Android, later all: You lot tin can customize the Bone any way you lot see fit.
Credit: Tom'southward Guide

How To Set The Time On An Avaya Phone,
Source: https://www.tomsguide.com/uk/us/how-to-set-up-android-phone,review-5603.html
Posted by: wongthadespecte.blogspot.com
0 Response to "How To Set The Time On An Avaya Phone"
Post a Comment